How to Create SSO ID Using Jan Aadhaar, Aadhaar & Google Account (2026)
Before you can apply for a government job in Rajasthan, access your Jan Aadhaar details, pay a utility bill online, or enroll in a state welfare scheme, one thing stands between you and all of those services: registration on the Rajasthan Single Sign-On portal. Creating your account is free, takes only a few minutes, and unlocks access to over 100 government services through a single dashboard. The only question worth asking is which registration method suits you best.
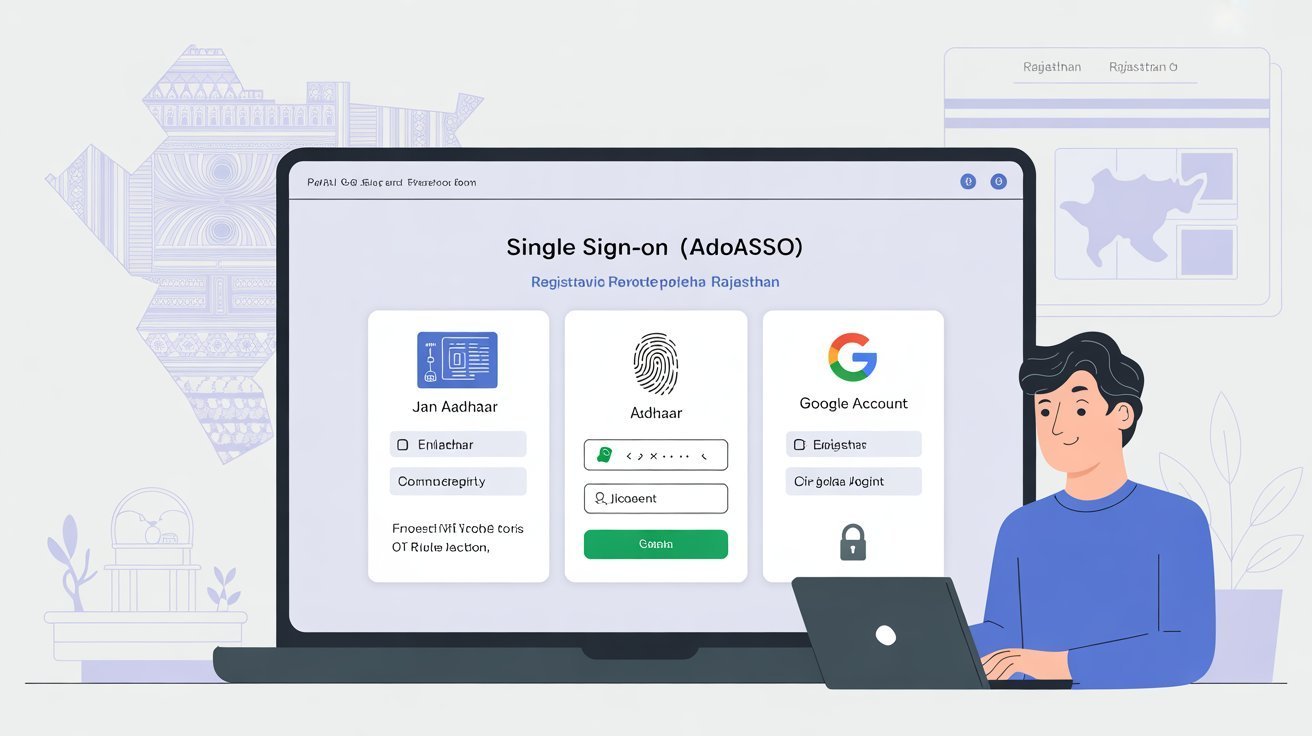
This guide covers the three most widely used paths to registration in 2026: Jan Aadhaar, Aadhaar, and Google Account. Each method serves a different type of user, and understanding the difference will save you time and frustration before you even open the portal.
Why the Registration Method You Choose Actually Matters
Not all registration paths are equal in terms of the access they provide. When you link your account to a state-issued identity document like Jan Aadhaar or Aadhaar, the portal automatically pulls your verified personal details from government databases. This means your name, date of birth, and family information are pre-filled and already authenticated, which makes it easier to access services that require identity verification, apply for Direct Benefit Transfers, and use schemes tied to the Chiranjeevi health insurance program.
A Google account, by contrast, is primarily designed for non-residents of Rajasthan or for individuals who do not yet have a Jan Aadhaar. While it is a valid and convenient option, some state-specific services may require you to subsequently link a government-issued document to your profile before they become accessible. Understanding this upfront will help you make a smarter decision at the start.
What You Need Before You Begin
Regardless of which method you use, having the right documents ready before you start will make the process seamless. For Jan Aadhaar registration, keep your Jan Aadhaar number or enrollment number on hand, along with the mobile number registered with it, since OTP verification will be required. For Aadhaar-based registration, have your 12-digit Aadhaar number ready along with the mobile number linked to that Aadhaar. For Google-based registration, you simply need an active Gmail account and access to the device where it is logged in.
In all three cases, you will also need to choose a username and create a strong password at the end of the process. Your username becomes your permanent SSOID, so think about it carefully. It should be something meaningful enough that you will not forget it, yet not so obvious that it compromises your account security.
Registering with Jan Aadhaar
For permanent residents of Rajasthan, this is the most recommended method and the one that gives you the broadest access to state-specific services from day one.
Open the official Rajasthan SSO portal and click on the Register button on the homepage. The portal will ask you to select your user type. Choose Citizen. On the next screen, you will see several registration options. Select Jan Aadhaar.
Enter your Jan Aadhaar number or enrollment number in the field provided and click Next. The portal will display the names of all family members registered under that Jan Aadhaar. Select your own name and the names of any family members you want to associate with your account, then click Send OTP. An OTP will be sent to the mobile number registered with your Jan Aadhaar. Enter that OTP and click Verify OTP.
Once verified, a registration form will open. Enter your email address, choose your username, and set a strong password. Review the terms and conditions, check the box to accept them, and click Register. Your account is now active and your login credentials will be sent to your registered mobile number and email.
Registering with Aadhaar
The Aadhaar-based registration process follows a very similar path and is suitable for residents who have an Aadhaar card with a linked mobile number but have not yet enrolled for a Jan Aadhaar.
Visit the portal, click Register, and select Citizen as your user type. From the registration options, choose Aadhaar. Enter your 12-digit Aadhaar number and click Submit. The portal will send an OTP to the mobile number linked to your Aadhaar. Enter the OTP to confirm your identity.
After successful verification, your basic profile details will be auto-populated from the Aadhaar database. Review these details, then fill in any remaining fields such as your email address. Choose a username that will serve as your permanent login identifier and set a strong password. Click Register to complete the process.
One important note: if your Aadhaar is not linked to an active mobile number, you will not receive the OTP, and the registration cannot proceed. In that case, visit an Aadhaar Seva Kendra to link your mobile number first, or choose the Jan Aadhaar method if you have a Jan Aadhaar card instead.
Registering with a Google Account
This option is designed for Indian citizens who are not permanent residents of Rajasthan, or for individuals who want a quicker registration experience using credentials they already have.
At the registration page, select Citizen and then choose the Google option. The portal will redirect you to Google’s standard sign-in page. Log in with your Gmail address and grant the necessary permissions. Once authenticated, you will be returned to the SSO portal where a registration form will open.
Here you will see a system-generated SSOID that you can either accept or modify to your preference. Enter your mobile number and email address, set a password, and click Register. The process is notably faster than the document-based methods because it bypasses document verification, but keep in mind that you may need to link your Jan Aadhaar or Aadhaar to your profile later when trying to access services that require identity confirmation.
After Registration: What to Do Next
Once your account is created, log in immediately and take a few minutes to complete your profile. If you registered via Google but are a Rajasthan resident, go to the profile section and add your Jan Aadhaar number. Click Fetch Details and the system will pull your verified information automatically. This step unlocks the full range of state services available on the platform.
Make sure your registered mobile number is active and accessible. The portal relies on OTP verification for many services, password resets, and account recovery. An outdated or disconnected mobile number is the single most common reason people get locked out of their accounts.
Also note that each Aadhaar or Jan Aadhaar can only be used to create one account. Duplicate registrations are not permitted. If you try to register with a document that is already associated with an existing account, the portal will flag the conflict. In that situation, use the account recovery process to retrieve your previous credentials rather than creating a new one.
A Practical Note on Security
Government portals hold sensitive personal information, and the Rajasthan SSO system uses SSL encryption and OTP-based multi-factor authentication to protect your data. From your side, the most effective security measures are simple: do not share your password or OTPs with anyone, avoid logging in from shared or public computers, and always use the official logout button rather than simply closing the browser tab. If you are using a mobile device, consider downloading the official SSO Raj app for a more secure and optimized experience.
Creating your account is the starting point for every digital government interaction in Rajasthan. Once registered, everything else, from job applications to health scheme enrollments, becomes significantly easier to access and manage from one place.